I am so excited for today’s Guest Blogger post. 🙂 Maria @ Love & Sugar Kisses is here with one of her amazing tutorials!!
She is also a very talented cake decorator. I have been drooling at some of her wonderful creations. Her cake she recently made for her daughter’s puppy party was A-MA-ZING!!! You have got to check it out (after you read the rest of her post – hahah)
So without further ado — Maria… take it away….
Hi! I’m Maria from Love & Sugar Kisses!
![]()
I’m super excited to be guest blogging for the very first time on one of my favorite blogs! I love Nothing but Country and always find so many fun ideas here!
Over at my blog Love & Sugar Kisses, I like to share my love of cake decorating and making crafts. I also love parties on a budget and feature great money saving DIY ideas whether they are mine or fabulous how-to’s from other great bloggers!
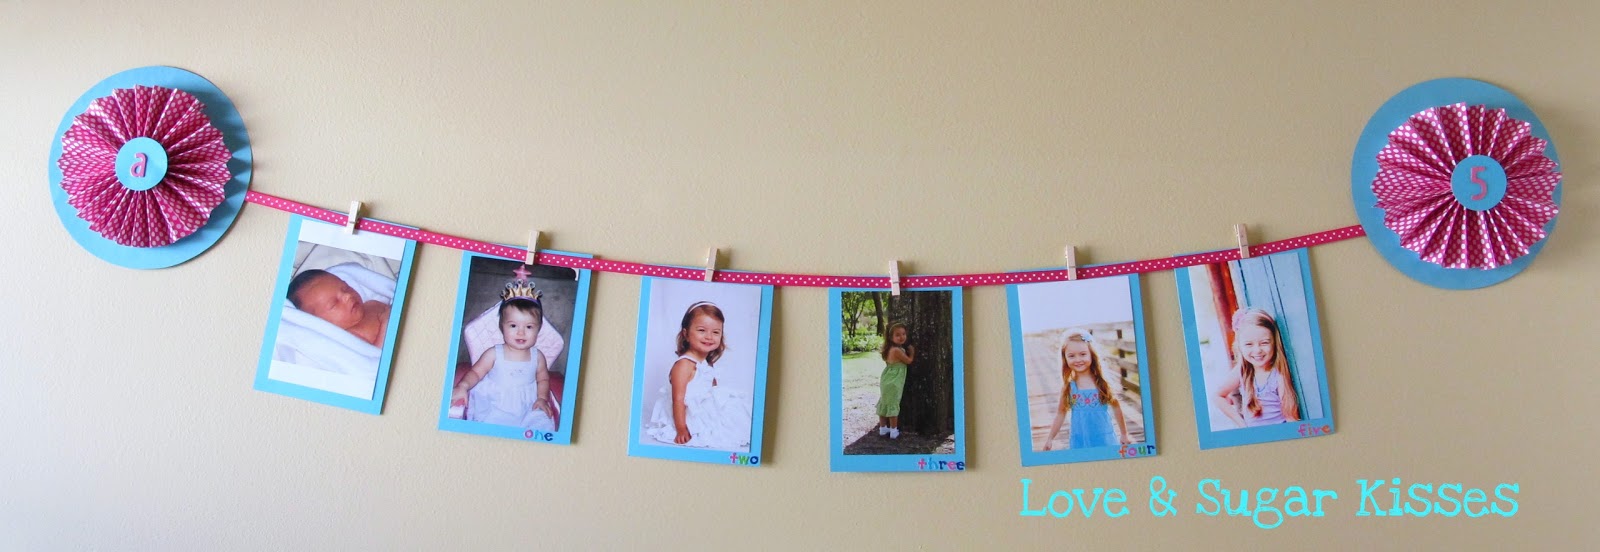
Today I would like to share with you a super easy and inexpensive party decoration that I made for my daughter’s recent birthday party. It’s a Photo Collage Banner that is perfect for any birthday party, no matter what the guest of honor’s age!
What you will need for your banner:
- cardstock: 2 sheets plus additional for photos (1 sheet for every 2 photos)
- scrapbook paper: 2 sheets of 12×12
- small alphabet (or number) stickers
- 1 chipboard letter & 1 chipboard number (child’s initial & age)
- coordinating ribbon
- mini clothespins (one for each photo)
- glue dots
- large bowl for tracing circles
- 2″ circle punch (or small cup)
- scissors
- photos of your choosing (4×6)
To begin, cut your cardstock to approximately a 5×7 (one for each photo), so it’s just a little larger than your 4×6 photo. Using the glue dots, mount pictures onto the cardstock.
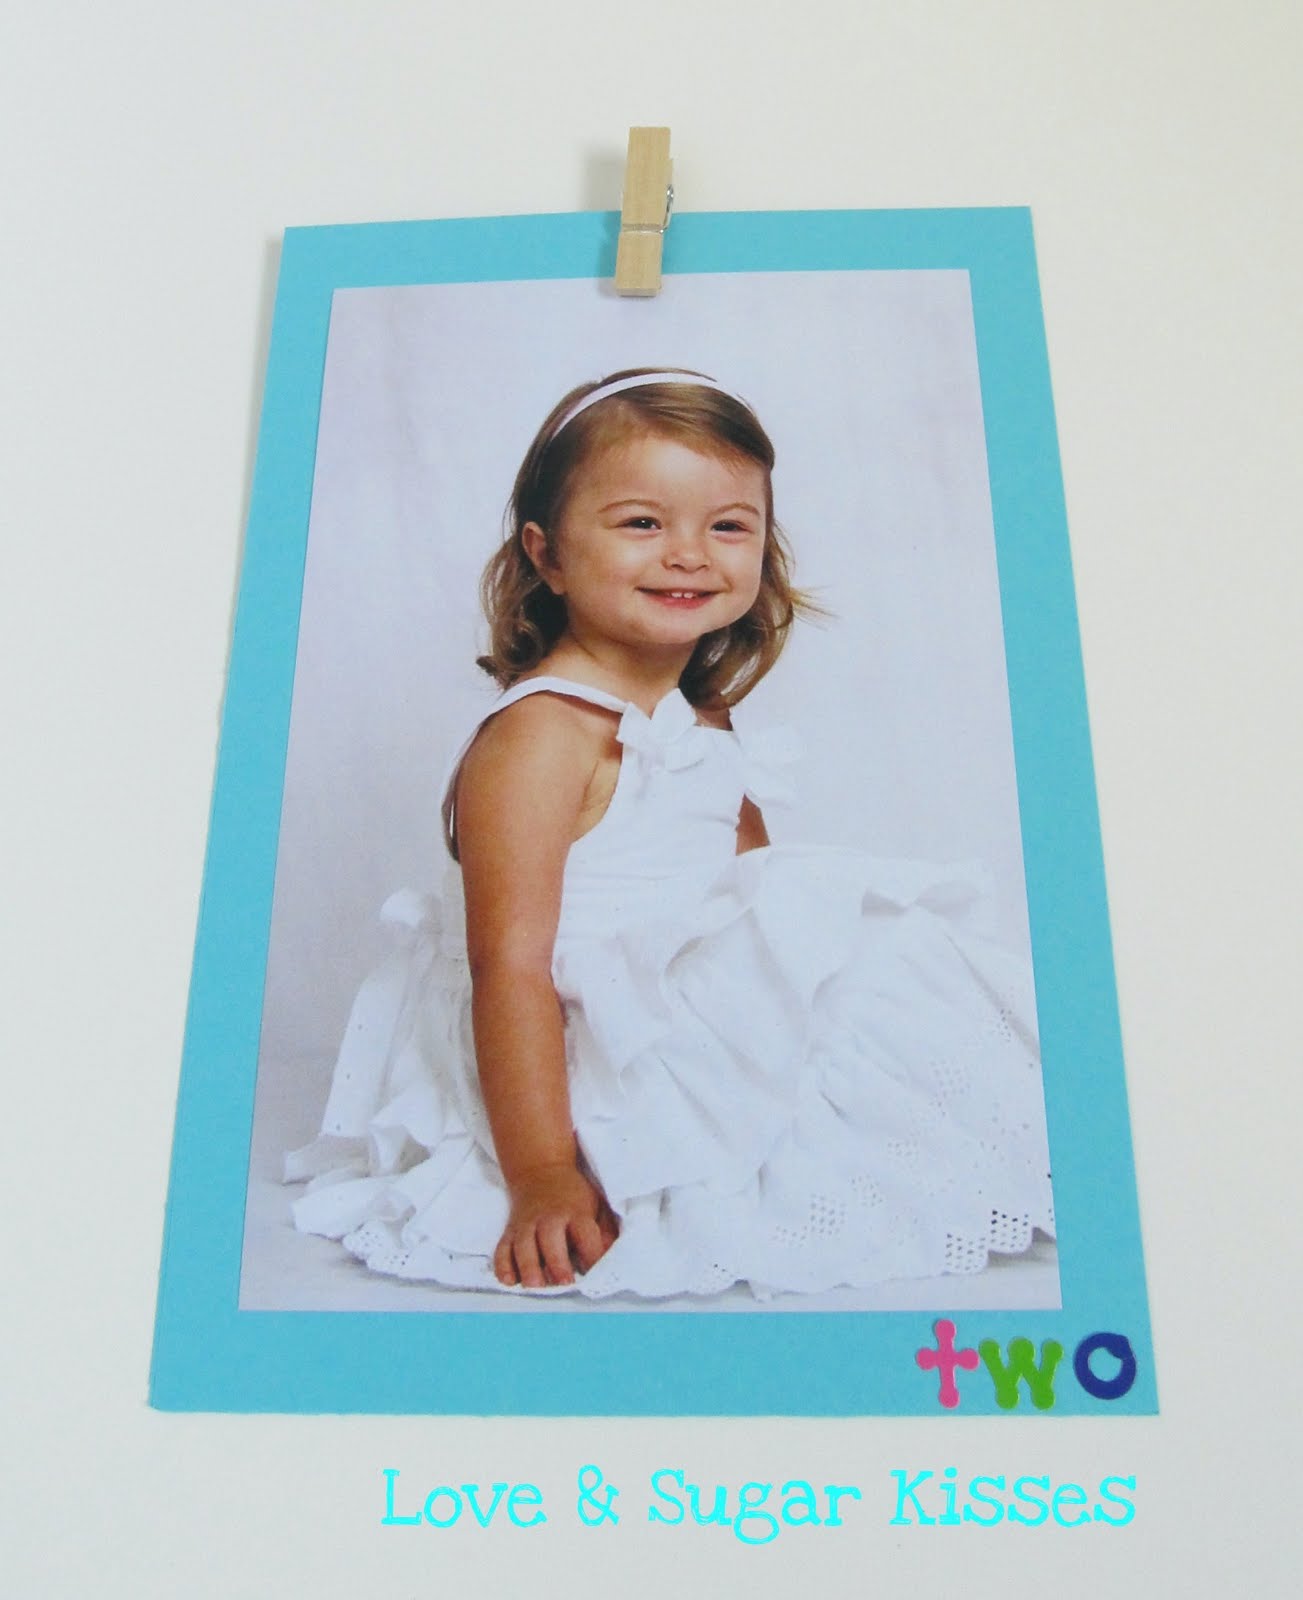
Next, use your alphabet stickers to spell out the age on the bottom. You could use a number instead, but I just liked how cute the spelled out word looked. But if you are making this for an older child or adult, then you are probably going to be better off with numbers!
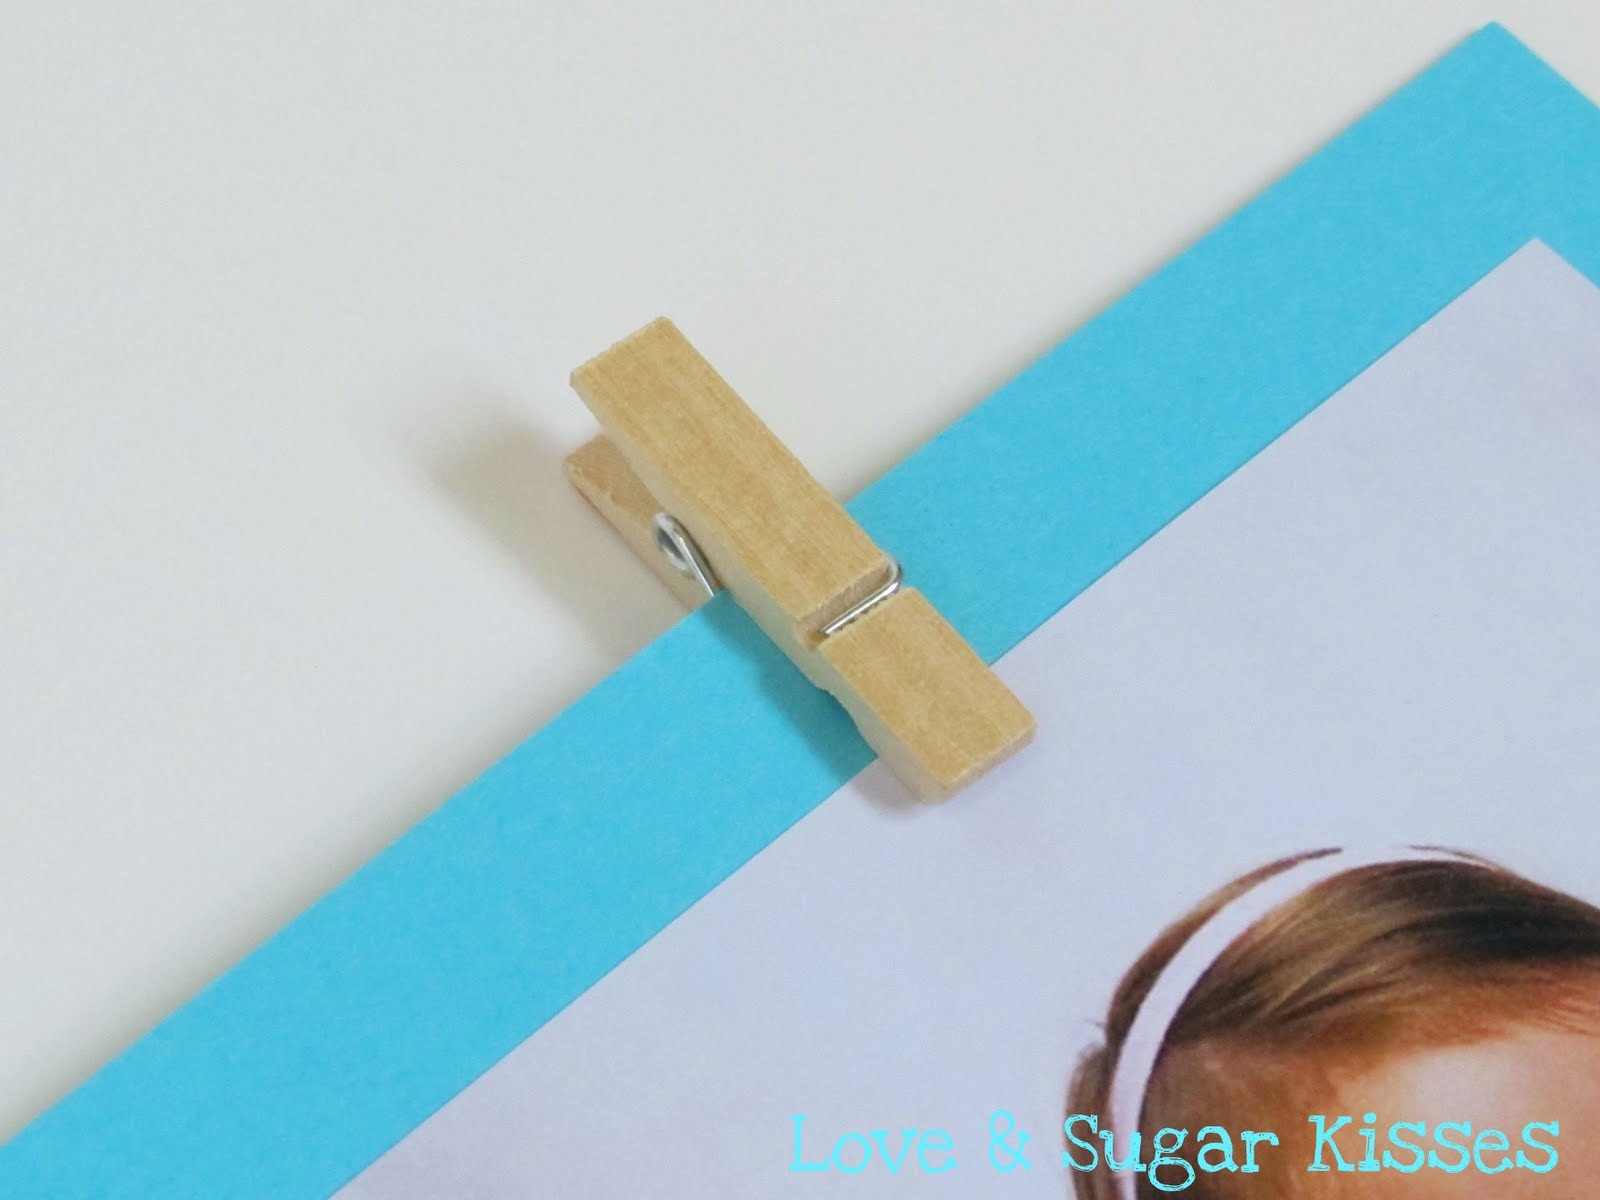
Clip a mini clothespin to each photo and put them aside for now.
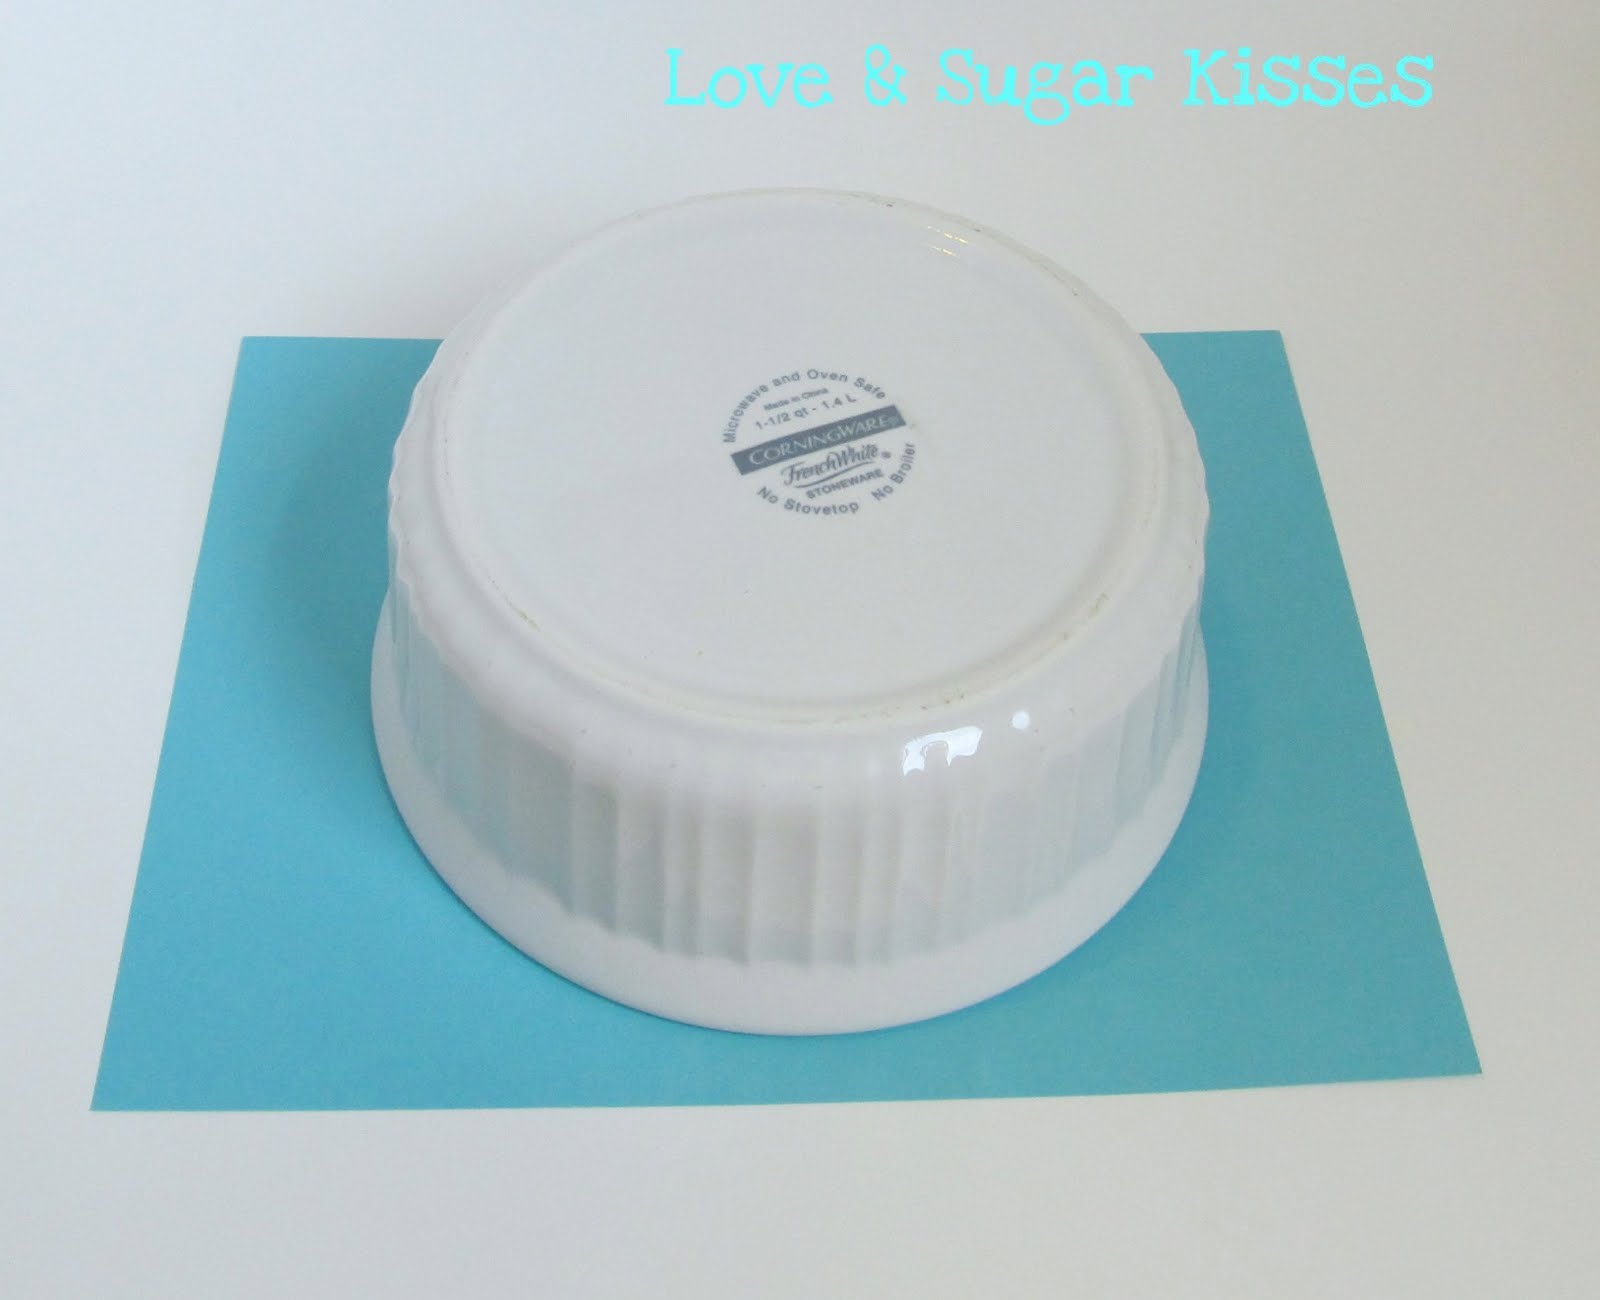
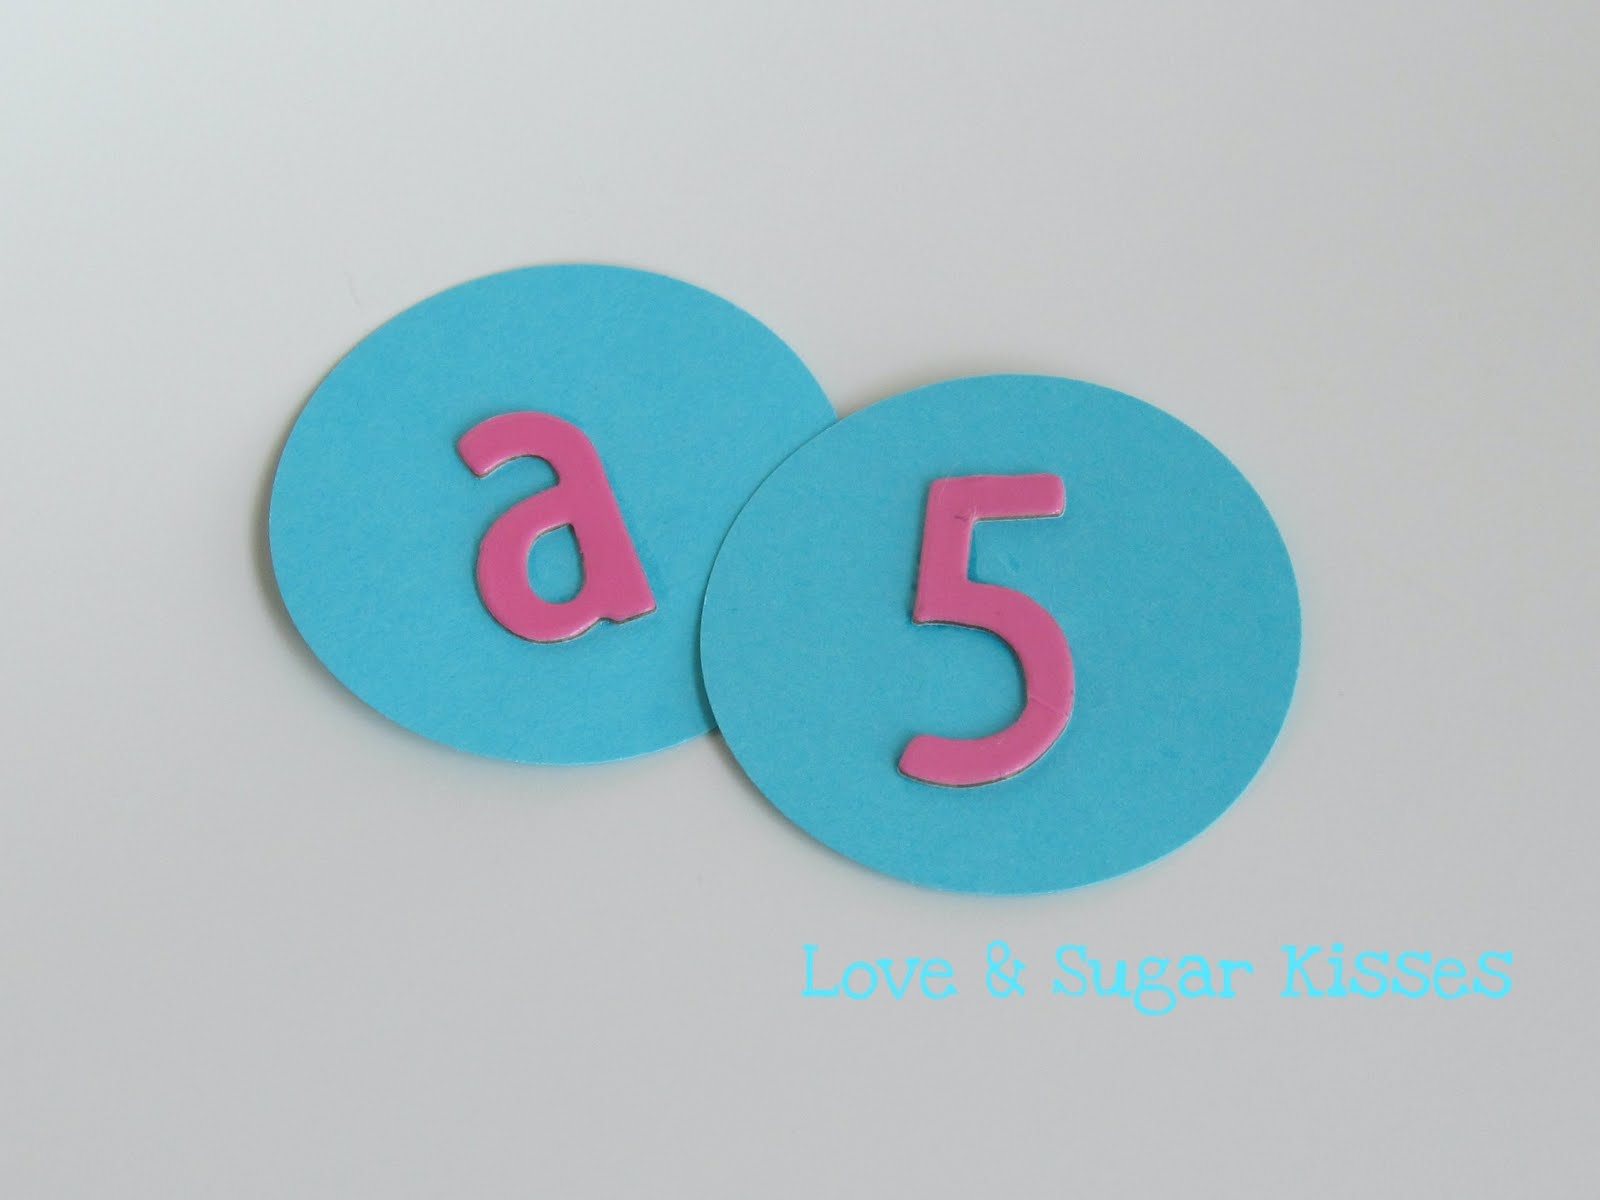
Using your large bowl as a template, trace two large circles out of the cardstock. My bowl & circles are 7 3/4″ across.
Using your 2″ circle punch (or a small cup as a template) cut out 2 small circles. I love to use every inch of my paper, so I just used my scraps.

Attach the chipboard letter and initial to each circle (you could use a large sticker instead).
Next it’s time to make the rosettes. Besides my daughter’s pictures, this is my favorite part! I just love how festive paper rosettes are.
Take a sheet of your scrapbook paper and fold it accordian-style.

Fold the paper in half and cut into two equal pieces.
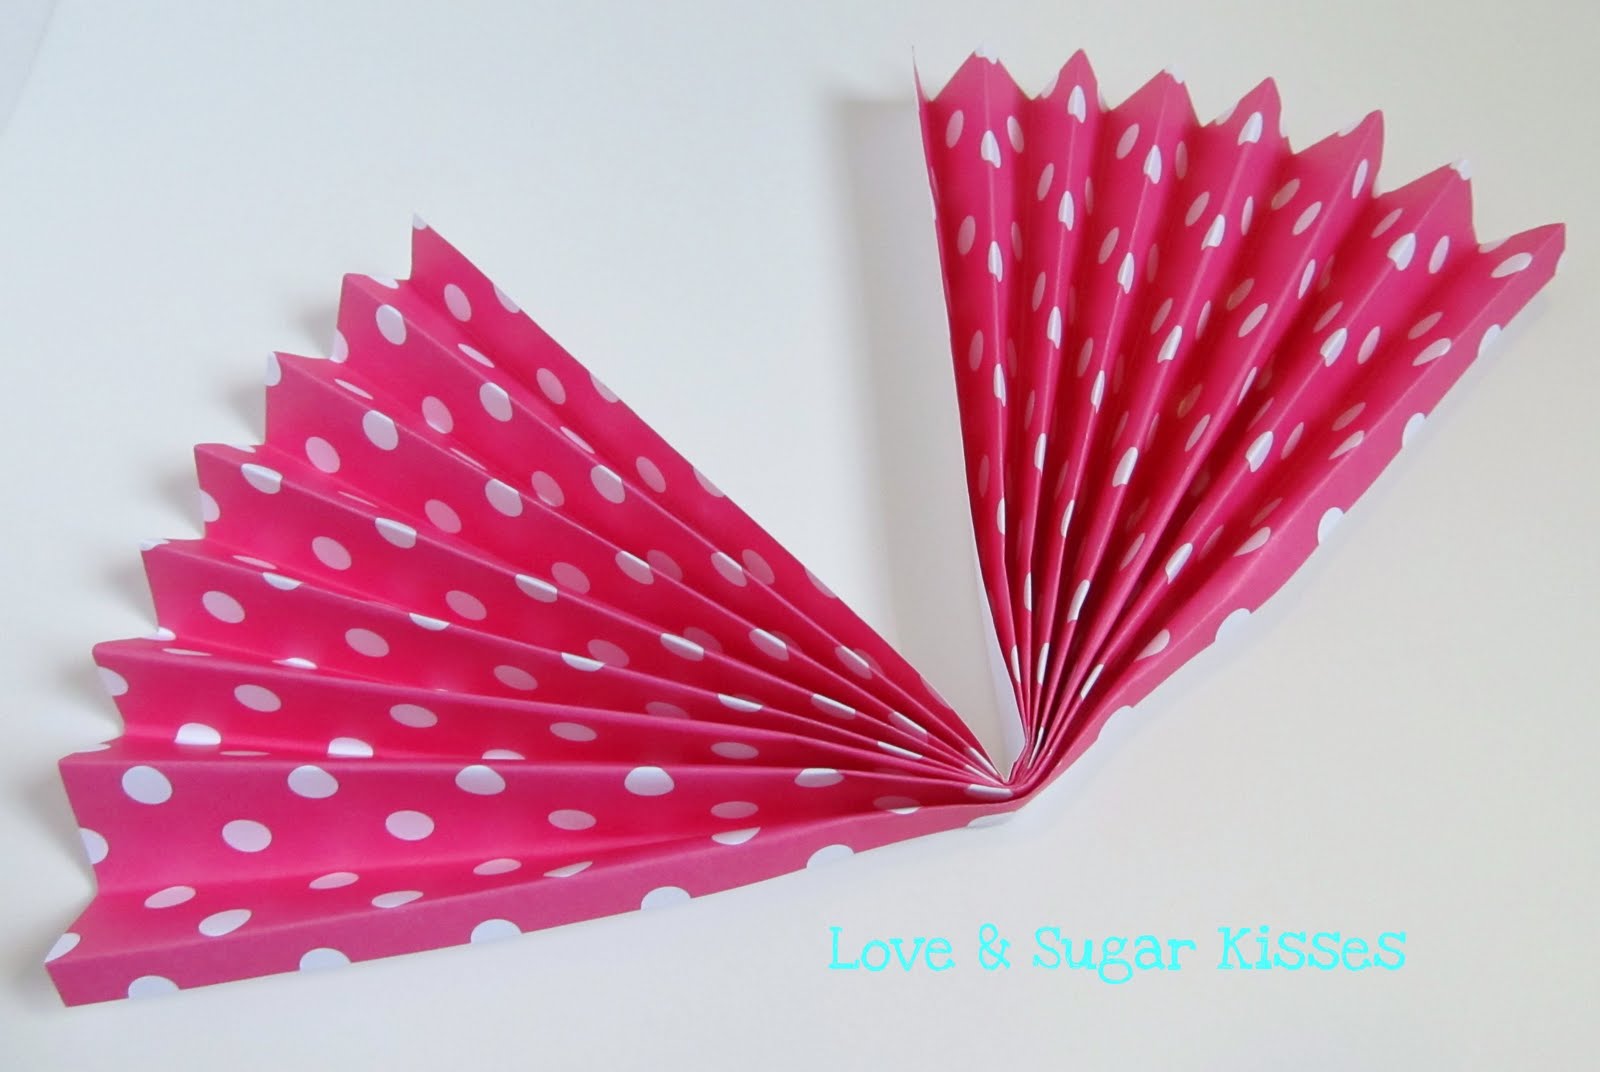
Take each of those pieces and fold them in half.
Using your glue dots, seal the open end to form a half-circle. Repeat on the other piece.

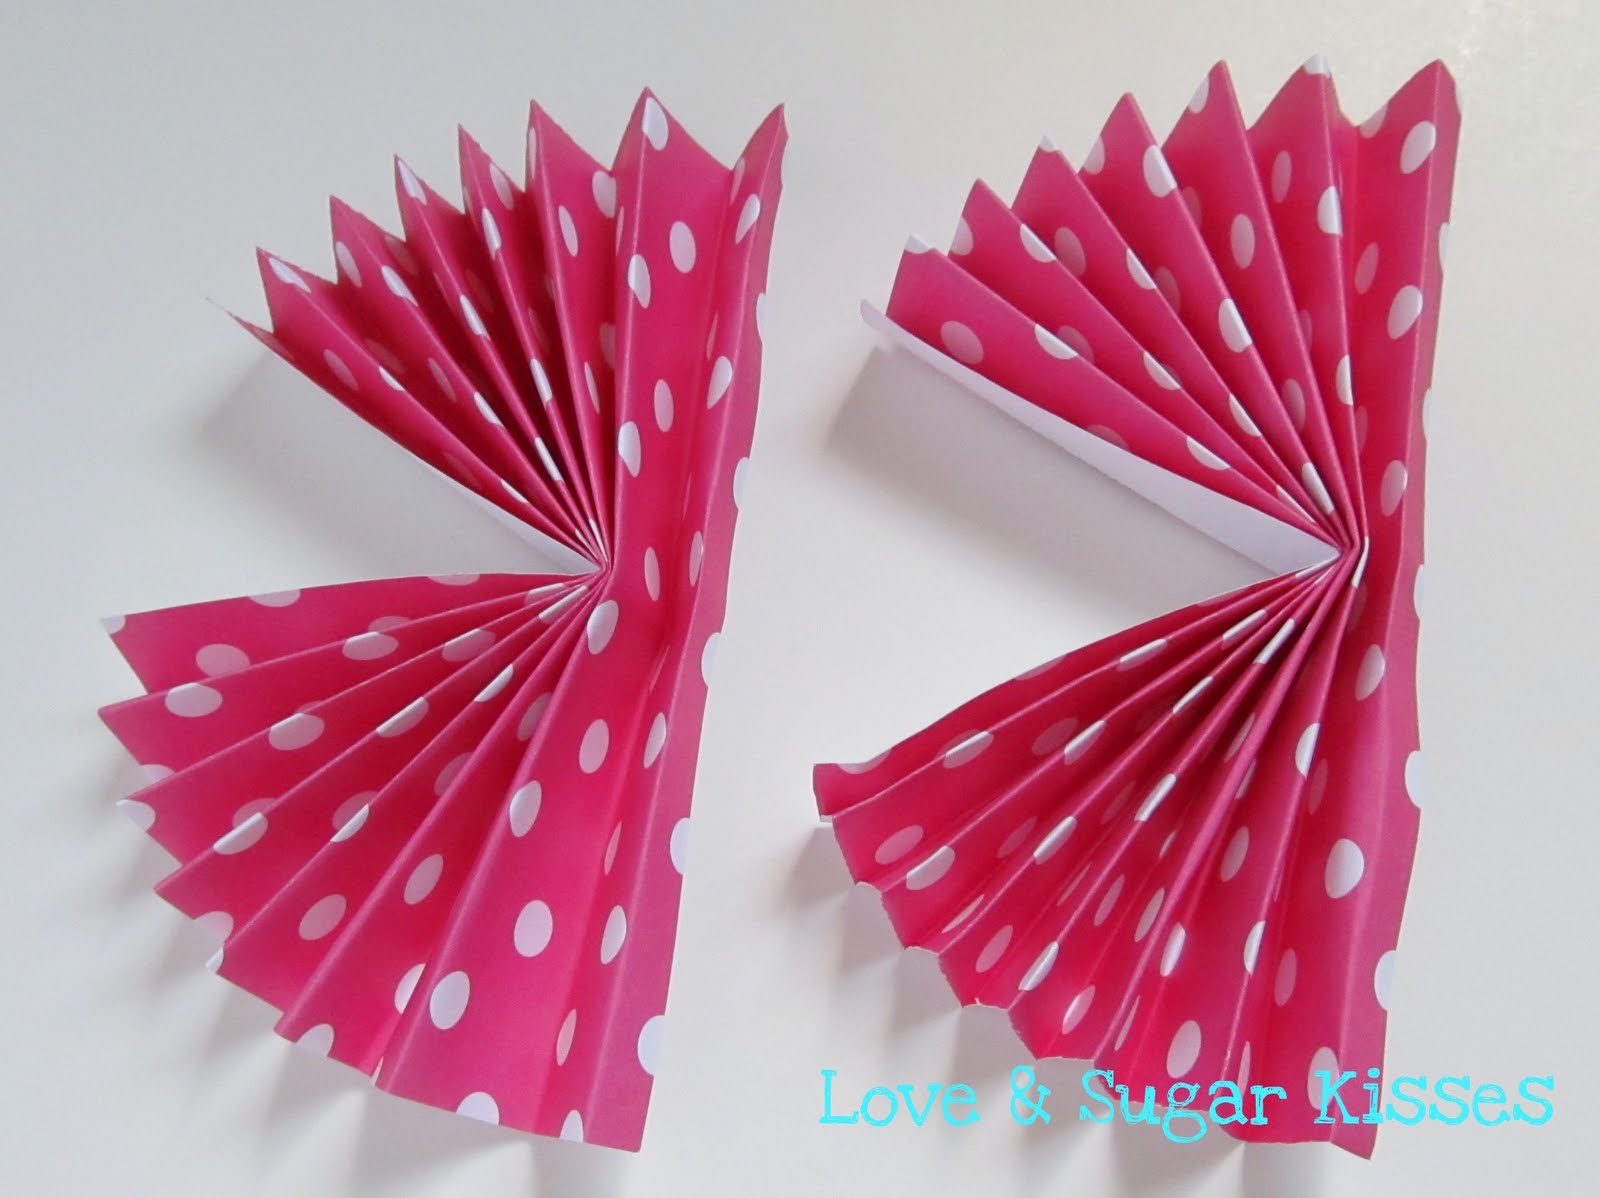
You should now have two semi-circles.

Using your glue dots, attach both halves together and use additional glue dots to seal up the center. You should now have one very pretty paper rosette! Repeat to create the rosette with the other piece of scrapbook paper.
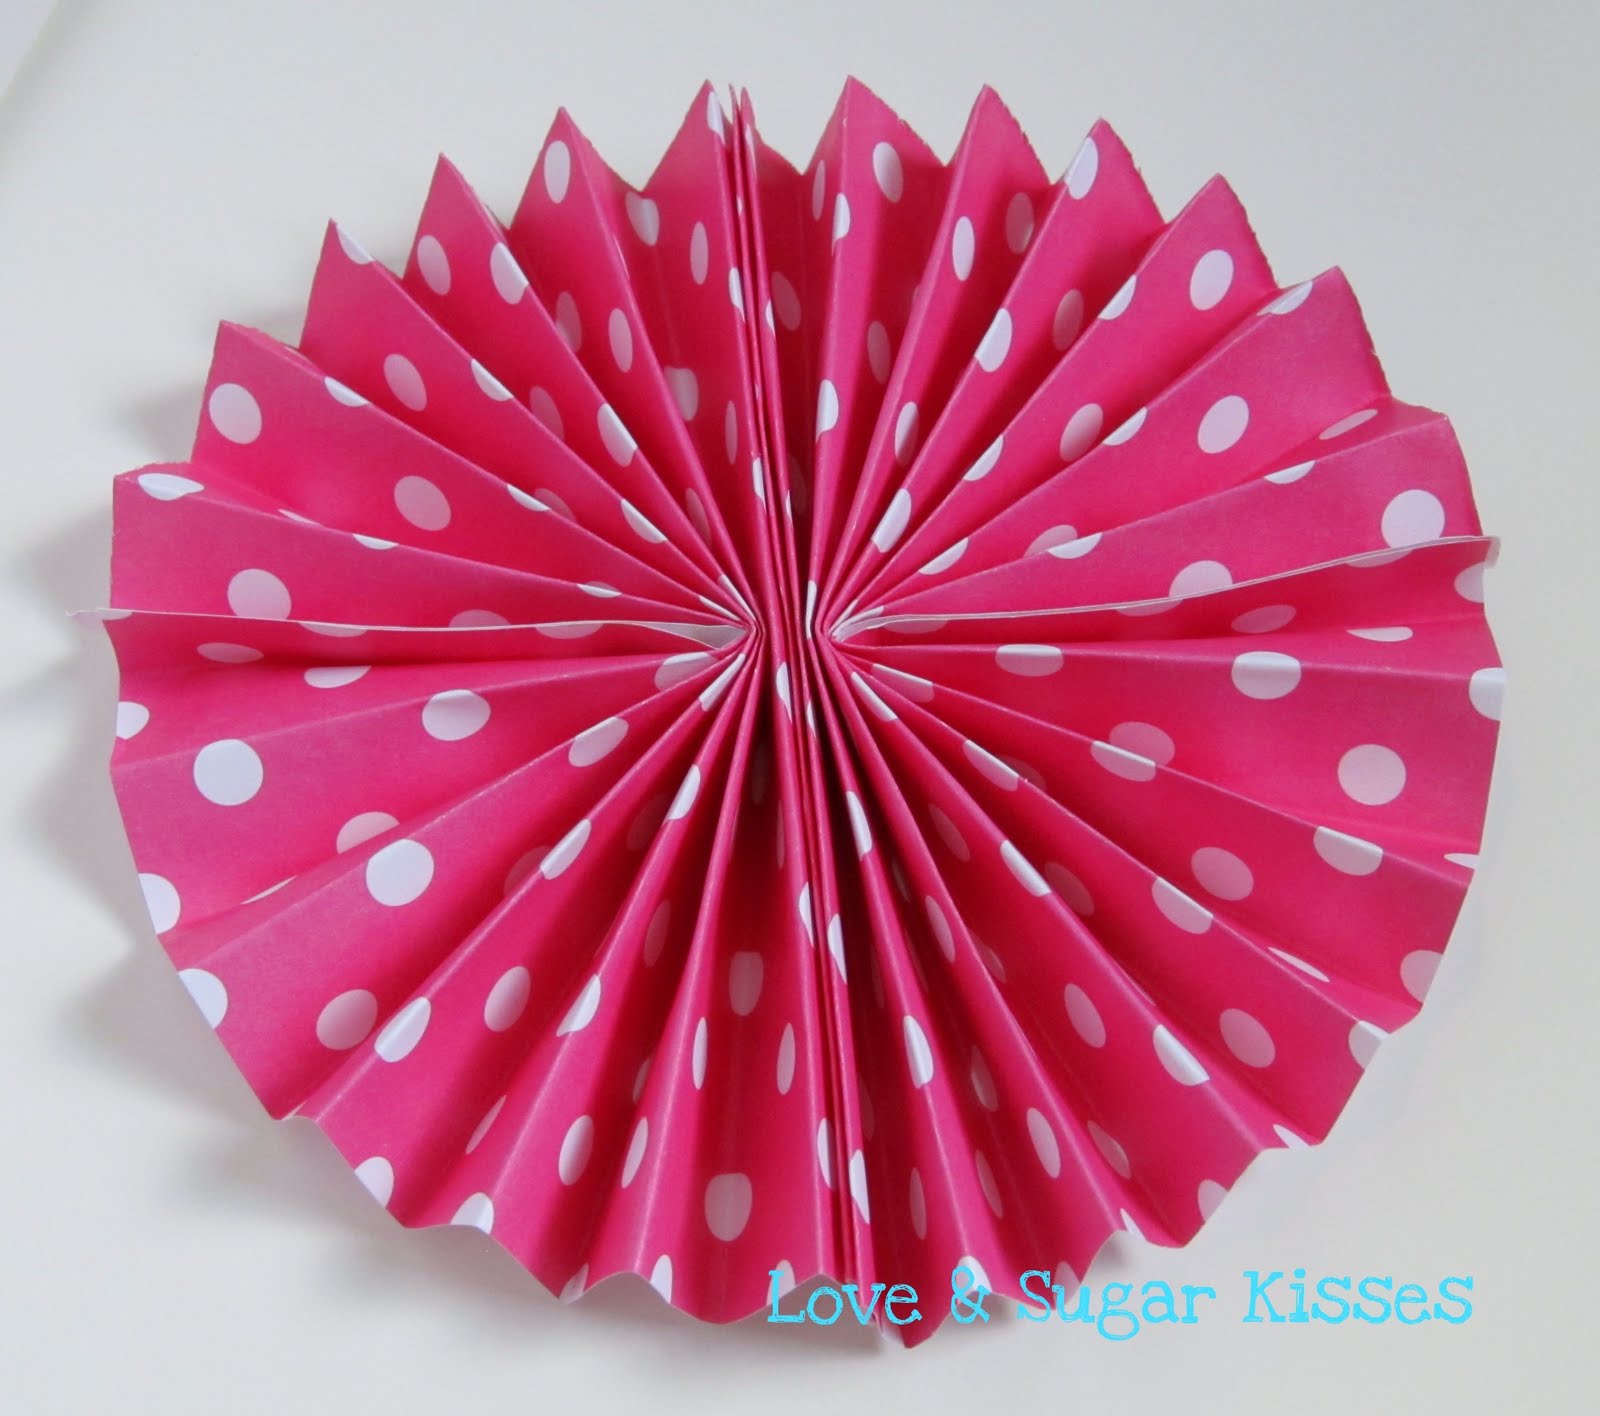
Now it’s time to put it together! Use your glue dots to attach the small circle onto the center of the rosette and then attach the rosette to the center of the larger circle. I seriously don’t know what I did before glue dots!

Cut your ribbon long enough to hang all your photos, plus 4″ on each side. It’s helpful to lay out your ribbon and place your already mounted photos along it to make sure you have enough. Attach the extra 4″ of ribbon to your large circle using…glue dots of course! You will be attaching it to the back side so make sure your ribbon pattern (if any) is facing correctly.

Now your fabulous party banner is ready to be hung! I used rolled up packing tape to mount it to my walls, but I know not everyone is comfortable with tape on their walls…LOL! So use whatever method you prefer to adhere the banner to wherever you want it displayed.
Once you have your banner hung, clip your photos on and your decoration is ready to party!

I hope you enjoyed this fun Photo Collage Banner tutorial and are inspired to make one for your own celebration!
Thanks so much to Mary Beth for having me here at Nothing but Country! It was a pleasure and an honor to guest post. I hope you will stop by Love & Sugar Kisses and see what sweet ideas I have for you! You can also find me over on Facebook so stop by and say hello!
LOVE THIS IDEA!!! Fun fact – Maria recently had that puppy party for her daughter. I have been following her blog for some time- then in April she posted she was planning for her daughters Puppy Party just like I was. 🙂 She is an early planner like myself. (Altho hers was in July mines not till September) So it was super fun bouncing and sharing ideas off each other about our daughters party. She did a GREAT job at hers too. Hope I can do half as good as she did and I will be thrilled. 🙂
Thank you so much Maria. Loved having you here at Nothing But Country.
So be sure to stop by and visit Love & Sugar Kisses. Tell them hello!!
Website – http://lovesugarkisses.blogspot.com/


Thank you so much for having me here today!!
Maria 🙂
What a sweet banner! I love the clothes pins. They would make it easy to trade the pictures out, too!
[…] Guest Blogger – Maria @ Love & Sugar Kisses – 1 freebie(s)? […]